Do you like to compost and help you garden? Even if you live in a small space you can compost many of your food scraps.
I had to restart my worm colony that I had for over five years, I think it was much longer but I don’t recall how long.
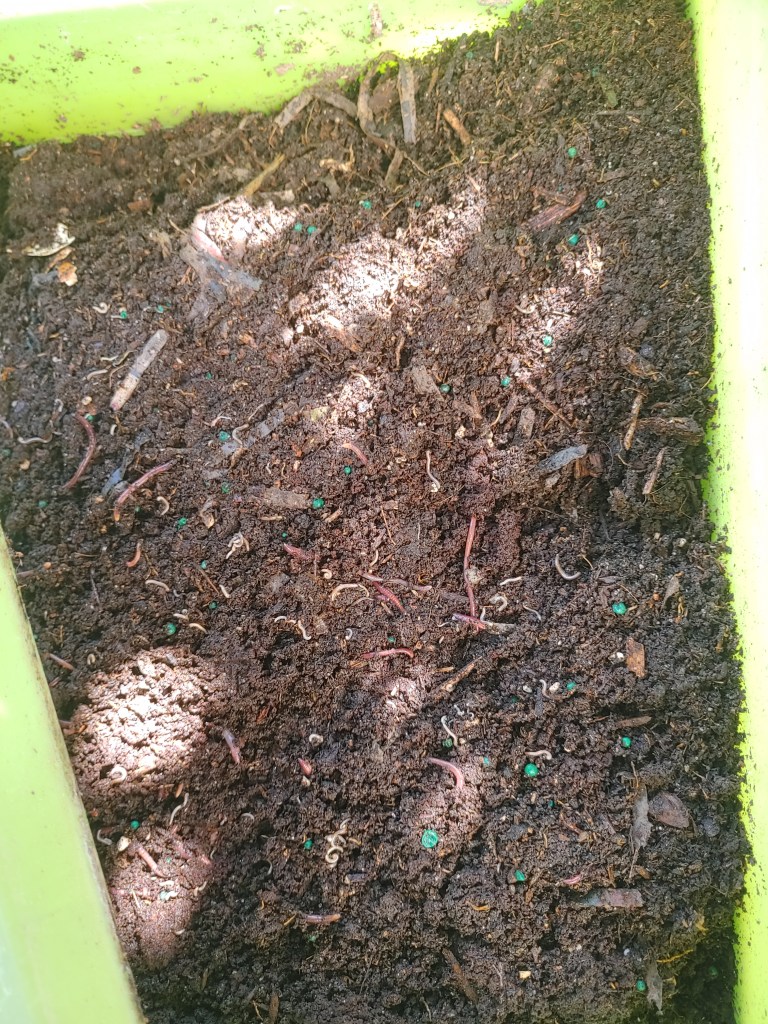
Red wigglers and a worm cocoon (The yellow ball is the cocoon)
Start up costs can vary when you look into worm housing. I have a worm condo. I think it cost about $140 CAD then about $50 for a pound of red wigglers. This time for a red wiggler starter pack it cost $115.35 with shipping and handling.
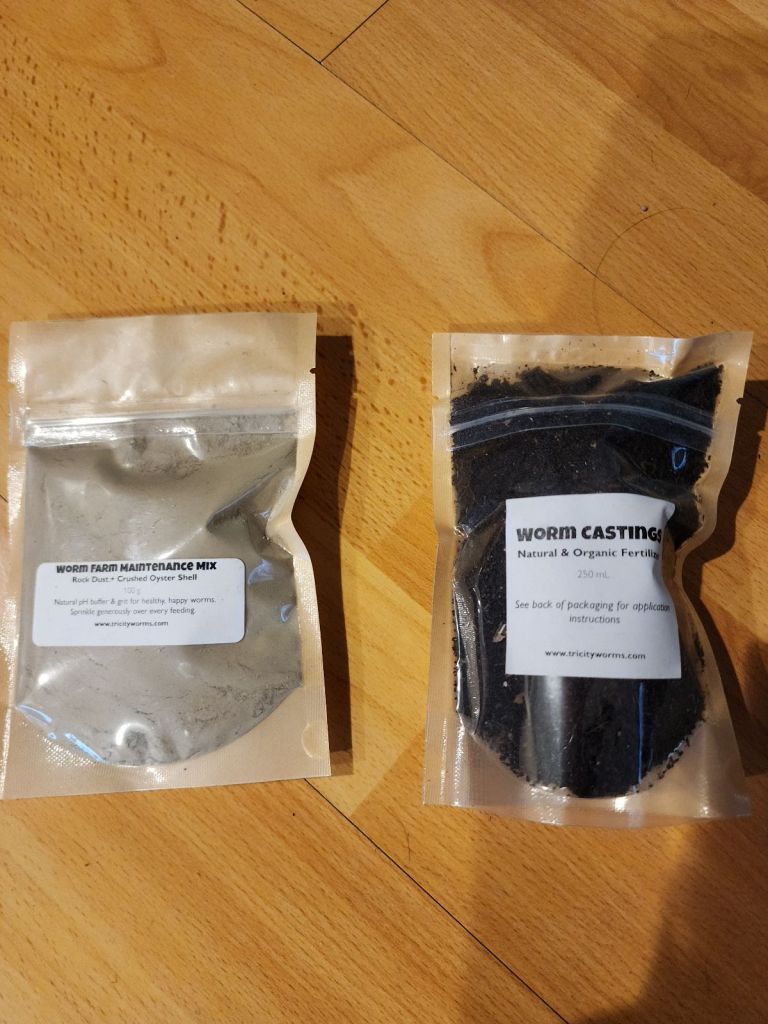
When we opened the new box with the worm kit it came with 1/2 a pound of worms in damp coconut coir, a small dry brick of coconut coir, shredded paper, a small bag of the finished product called worm castings and some fine powder of rock dust and calcium this helps them be healthy and break down food.
Powder for the worm food and worm castings.
You need a big clean container (rubber bin or bucket) to soak the coconut coir in water, just enough to barely cover it. That will soak up to 30 minutes or until it is damp and broken apart. You don’t want it soggy.
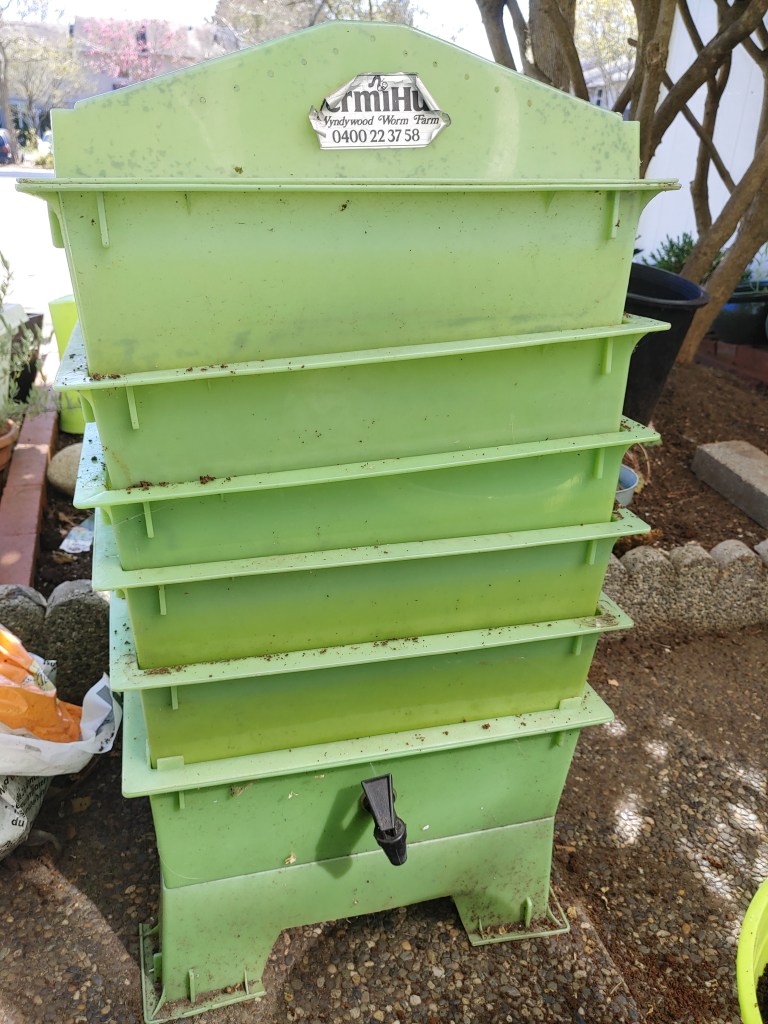
The stacking worm condo came with 5 trays a stand and lid
Then put it into your container. One side will be damp shredded paper the other the coconut coir. Move some of the coir apart make a divot big enough to put all the worms in. Pro tip, freeze cut up food scraps like carrot tops and peels, apple peels, melon rinds, strawberry tops, cut up banana peels, coffee grounds, tea leaves, left over greens (without oils or animal products like meat, bones, skins).
This is the food I have in the freezer, it helps to break it down and makes it easy for them to eat. (They have strong teeth so frozen is no problem) just teasing about them having teeth 😉
They need food every few days, so keep freezing their food. Or feel free to give it to them fresh.
Be patient this process takes months to get enough worms reproducing to use the worm castings. It will be worth the wait with the nutrients that they leave behind. a well kept colony will last years or decades.
You will likely be able to find a company in your area that sells the worms. Many communities have classes that include a set up. Talk to your local garden club or compost centers.
Have you spent the day sifting through dirt? It is spring, dirt and I are bonded. I try to wear gloves more than not. When I wear them, I can’t feel the dirt and any life huddled in the dirt.
Yesterday I took out my worm composting system. I started my worms over 5 years ago.
When I first started I got a big black tote I put in small shredding of newspaper, a couple handfuls of dirt and a handful of sand. Then I tucked in a small handful of frozen food scraps. ( apple peels, banana, tea leaves, coffee grounds, fruit and veggie tops and a few carrot shavings). Things went great till we had a hot summer.
Devastation happened, my whole big colony was dead. It left me heartbroken. I had to do new research to learn better ways to build and feed my worm bins.
I really was just winging it. I called a local place that sold compost worms and farms. I bought a five tray stacking unit and a half a pound of red wiggler worms
With the worms and the bin It was about $176. You can make one for under $30 dollars, without the worms. Worms vary in price. 1 pound of worms cost about $45. If gardening and dirt are something you love you might want to add a worm bin. I have read many things on this type of composting, and done it a few different ways. Many communities have a composting class and an ability to get a full basic set up for a bit less, that’s group rate. I think that this might be on hold in many parts do to the pandemic.
When I had my big black tote one of the setbacks was getting the matter and worms out when it was time to use the worm castings. It was very heavy!
I really love my stacking worm system. I can take off one layer at a time. As I had shared before with some of the things going on with my health, I don’t always have enough energy for a big project. Two or three times a year I sort out my worms and start new trays. When I had to do this with my huge bin it was too much work.
Worms would rather not be put through huge temperature ranges. If it gets too hot I put them in a cool place, I store them in the shed in the winter. We don’t get extreme weather in my part of the world, but they are happier in a closed building.
You can keep small bins in an apartment or home. If you take good care of your bin and always cover your organic matter the bin could go under the sink and not smell bad.
You might be thinking what is the benefit of worms or maybe you fish and think bait.
I dumped in old potting soil at the end of late summer, the soil had green slow release fertilizer in it so that is one thing the worms will not break down. Meet some of my worms! Wave your tails little guys! This bin has a bit more work for the worms.
As tasty as they might be to a fish, I would like to tell you your plants will thrive when you add worm casting to their pots. It adds nutrients to your plants, worms work is never done. They eat up all the things you give them, so please no junk food. The byproduct of them munching is a substance that helps plants fight against many diseases makes the stem growth stronger.
When trying to find the science of how much to use I have read things like one cup of casting to one cup of dirt, some sites say 5% worm casting to the pot, There is some room to grow and experiment. I have added it to the top of pre existing plants, I found that the top dried out faster, So if you add it to the top be mindful to mist the plant.
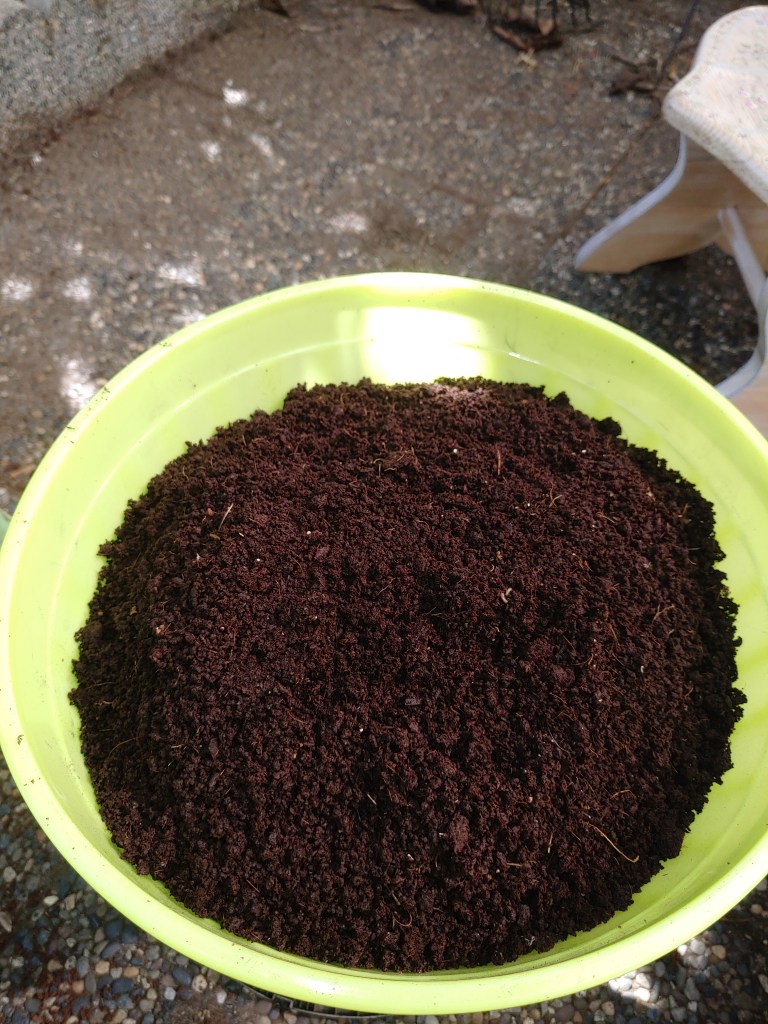
This is the wonderful worm casting you are left with. This was April 13, 2021 after taking the worms out.
Something I learned years in, is worms need egg shells now and then. It helps them build healthy strong offspring. You can do this a couple of ways, smash freshly used shells and sprinkle them in, or put 3 halfed eggshells in after making whatever you are enjoying with eggs. I like to do this at the end of fall before I put them away for the winter. It gives them a nice place to hide and for food. I will talk more about winterising your worms in the fall.
I just remembered a tip that is not often mentioned in the videos, One spot feeding. I scoop out a bit of the medium and add a hand full of cut up organic matter. You don’t need to cut it up, I just do. Then I cover it with fresh shredded paper from my paper shredding machine. I used to rip it all up but that was painstakingly long. This method keeps the bin from getting rot, keeps your worms moving to find the food. It is key to keep your paper a bit wet, worms don’t like things too dry or soaking wet. They like oxygen too!
Things that should not be fed to your worms, meat and animal products, including dairy. No animal or human feces. No oils, fats, chemicals or dryer lint. Try to limit your citrus.
Words in worm composting
Bedding– refers to the base material you put in to start your bin.
News paper, coconut core, toilet paper rolls, cardboard.
Organic matter
Food scraps like apple peel, carrot shaving, broken up old bread, banana peels, avocado peels, coffee/tea grounds.
Housing/farm– place you keep you worms in, plastic bin, stacking system.
Worm casting-the byproduct of eaten organic matter. (aka worm poo) Don’t worry it does not carry the unhealthy things other living things have in their waste matter.
Now I have shared about worm dirt, let me know your thoughts on worm compost. If you have any questions please ask. I will do my best to answer. Have a great week. Hope you get out to enjoy the outside.